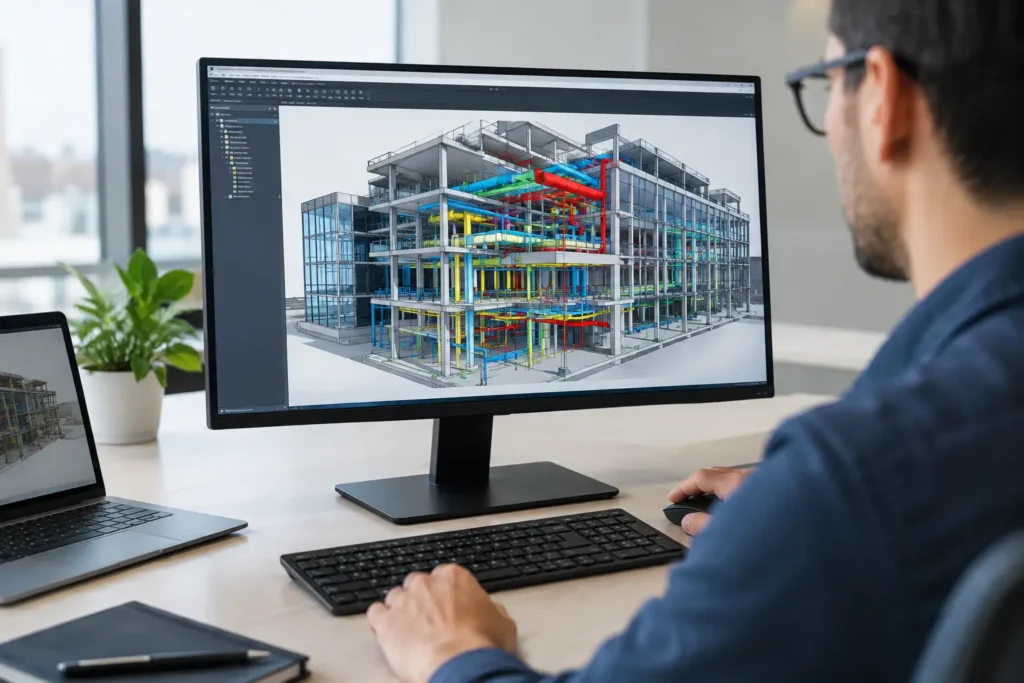
A coordination meeting becomes expensive when architectural, structural, and MEP teams discover a conflict after site work has started. Navisworks Manage gives BIM professionals a practical way to bring discipline models together, identify issues early, and communicate decisions with clear visual evidence. Learning how to use Navisworks Manage is therefore not only about operating software – it is about protecting time, cost, constructability, and project credibility.
For engineers, architects, BIM coordinators, and project teams in Dubai and across the GCC, Navisworks Manage is often the coordination layer between Revit authoring models and real construction decisions. The strongest results come from a defined workflow, not from running a clash test and exporting a long report.
Start with the right Navisworks Manage file workflow
Before appending models, understand the three common Navisworks file types. An NWC file is a cached model created from a source application such as Revit. An NWF file is the working coordination file that stores links to appended models, saved viewpoints, clash tests, sets, and appearance settings. An NWD file is a published snapshot for review and distribution.
For active coordination, work in an NWF file. It remains relatively light and can be refreshed when consultants issue revised models. Use NWD when you need to share an approved coordination package with a project manager, client, or site team that should review the model without changing the live coordination setup.
Create a consistent folder structure before work starts. Keep discipline models separated by package, date, and revision. If filenames change without control, Navisworks can lose file paths and the coordination team can accidentally review outdated information. A simple agreed naming standard is more valuable than a complicated file structure that no one follows.
Append models and verify alignment
Use Append to bring models from Revit, Civil 3D, AutoCAD, IFC, and other supported formats into the federated model. Avoid manually moving individual discipline models to make them appear aligned unless you have confirmed the approved project coordinate strategy. A model that looks aligned because it was visually shifted may produce misleading clash results later.
Check units, levels, shared coordinates, project north, and model origin as soon as the models are appended. Walk through known grid intersections, building cores, and reference levels. If the structure is 10 feet away from the architecture, that is a coordination setup issue, not a clash to assign to a discipline engineer.
How to use Navisworks Manage for model review
A federated model can quickly become difficult to read. The Selection Tree lets you inspect model hierarchy, while the Properties window helps confirm element data such as category, system, level, dimensions, and source file. Use the Hide, Require, and Override tools to isolate the information needed for the review.
Selection Sets are especially useful for repeated tasks. For example, create sets for sprinkler mains, cable trays, structural beams, mechanical equipment, or interior partitions. Search Sets go further by using rules based on properties. A Search Set for all ducts above a specified width or all beams on a particular level can update when the model is refreshed, provided the source data is consistent.
Save viewpoints as you review the model. A useful viewpoint should show the issue from a position that someone else can understand immediately. Apply sectioning where needed, isolate relevant elements, and use color overrides to distinguish disciplines. A viewpoint is not just a screenshot location – it becomes an instruction for the person responsible for resolving the issue.
Set up clash detection with purpose
Clash Detective is the central coordination tool in Navisworks Manage. Open it only after model alignment and model content have been checked. Then create clash tests between meaningful sets, such as structural framing versus mechanical ducts or cable trays versus ceiling services.
Do not run every possible discipline against every other discipline without filtering. That approach creates thousands of irrelevant results and reduces confidence in the process. Instead, define the purpose of each test. A hard clash test can identify physical intersections, while a clearance clash test can check required space around equipment, access zones, insulation, or maintenance areas.
Tolerances require professional judgment. A zero-tolerance rule may flag tiny modeling overlaps caused by rounding or connector geometry. A 1-inch clearance may be appropriate for one coordination condition but unacceptable for another. Plant rooms, risers, ceiling voids, and service corridors usually need a more deliberate strategy than open areas of a building.
Review and group clashes intelligently
After running a test, classify clashes as new, active, reviewed, approved, or resolved based on your project protocol. Do not mark an issue resolved simply because a model changed. Re-run the test and confirm that the conflict has actually disappeared or has been accepted through a documented design decision.
Group repeated clashes that have one root cause. For instance, a long duct crossing several beams may generate multiple clash results, but it may need only one rerouting decision. Grouping keeps reports focused on actions rather than raw software output.
Add comments, assign responsibility, and attach a clear viewpoint. A good clash entry tells the recipient what is conflicting, where it occurs, what decision is required, and by when. Navisworks can identify geometry, but a BIM coordinator adds value by turning geometry into an accountable coordination task.
Use viewpoints and reports to drive action
A clash report should be tailored to the audience. A discipline lead may need detailed element properties and coordinates. A project manager may only need the issue status, trade responsibility, location, and agreed resolution date. Sending every stakeholder a 300-page report is rarely productive.
Use saved viewpoints during coordination meetings to review issues one by one. This keeps the discussion anchored to the model rather than assumptions. If your team uses issue-management platforms, follow the project’s approved handover process so that the Navisworks issue status and the formal project issue register remain aligned.
SwitchBack can also support faster correction when Revit models are linked correctly. It allows users to move from a selected Navisworks element back toward its source model context. Results depend on model preparation and software versions, so test the workflow before relying on it for a deadline-critical meeting.
Build construction logic with Timeliner
Navisworks Manage is not limited to clash detection. Timeliner connects model elements to tasks, helping teams visualize construction sequencing in 4D. Import or create a task schedule, then attach Selection Sets to activities such as excavation, structural frame installation, facade work, or MEP rough-in.
A 4D simulation can reveal access conflicts and sequencing risks that a static coordination review may miss. For example, a team may confirm that a large air handling unit physically fits in a mechanical room, but the simulation may show that it cannot be delivered after surrounding structure and services are installed.
The quality of the simulation depends on the quality of the schedule and model breakdown. Do not present a 4D animation as a construction plan if task logic, durations, and model scope have not been validated by the project team. Used properly, it is a powerful planning conversation tool.
Create a repeatable BIM coordination routine
Successful Navisworks coordination is consistent. At each model submission, refresh appended files, review the model revision, run approved clash tests, assess new and recurring issues, and publish clear outputs. Maintain a coordination matrix that states which disciplines are checked, what tolerance applies, who owns each test, and how often the team meets.
For beginners, focus first on model navigation, selection tools, viewpoints, sets, and basic clash tests. Experienced BIM professionals should progress to structured search sets, clash test templates, 4D sequencing, issue workflows, and project-specific reporting. The right learning path depends on whether your goal is design coordination, construction planning, QA review, or BIM management.
CADD International supports Dubai-based and international learners through instructor-led online, offline, hybrid, one-on-one, private, and customized Navisworks Manage programs. Sessions can be delivered in English, Arabic, Hindi, Malayalam, Tamil, or Kannada, with practical project assistance for professionals in Oman, Saudi Arabia, Kuwait, Bahrain, Qatar, Egypt, Sudan, and other MENA locations.
The most effective Navisworks users do not try to find the highest number of clashes. They create a reliable process that helps the project team identify the right issues early enough to solve them.